Manage your domain
To complete the DNS setup of your domain connected to TinyURL, please complete the following steps.
- Login and change DNS settings with your Bluehost account.
- Click the Domains tab from the side navigation menu to the left.
- Locate the domain you added to TinyURL and click Manage.

4. On the drop-down options for Manage, select **DNS**.

- Under Name Servers section, click Edit.

- Select Custom Nameservers for Setup Type.
- Remove and replace existing nameservers with all of the following:
ns1.tinyurl.com
ns2.tinyurl.com
ns3.tinyurl.com
ns4.tinyurl.com

- Click the Save button to confirm you changes.
Manage your subdomain
To complete the DNS setup of your subdomain connected to TinyURL, please complete the following steps.
- Login and change DNS settings with your Bluehost account.
- Click the Domains tab from the side navigation menu to the left.
- Locate the root of the subdomain you added to TinyURL and click Manage.
- Go to the DNS Zone Editor Section.

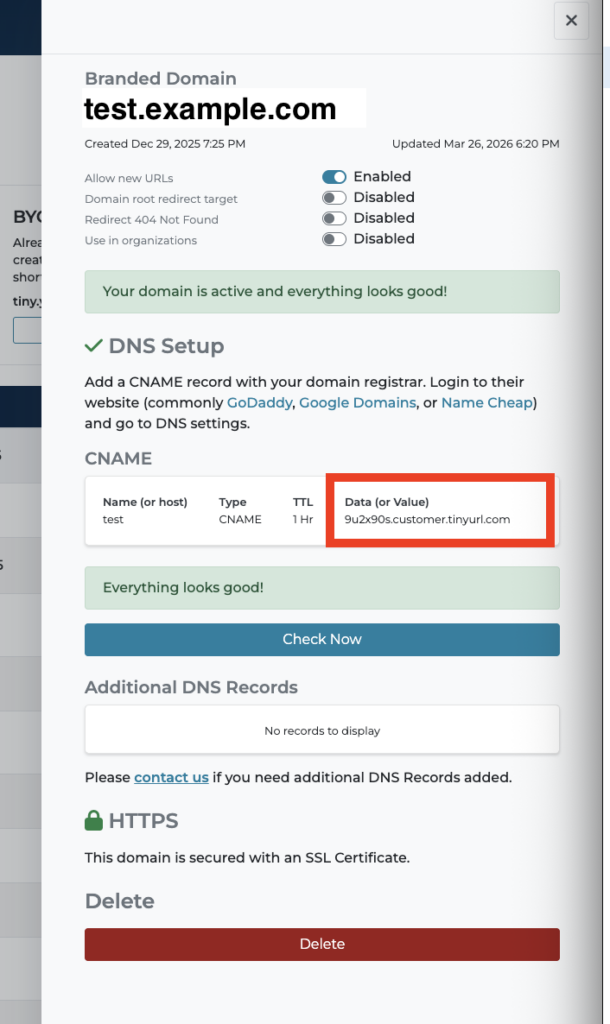
- To connect your subdomain to TinyURL, for example test.example.com, create a CNAME record on your domain regisrar and fill the following:
Type:CNAME
Host:test
Points to:copy the value shown in your TinyURL dashboard under Branded Domains or email, like the one highlighted in the screenshot

- Click Add record to confirm your changes.