Puppy Linux ISO files can be booted using
Super Grub2 Disk
Table of Contents Preparation - using SG2D’s IMG file for building a bootable USB for ISO booting |
Introduction
SuperGRUB2 (SG2D) is a distro that has a mission as a “boot helper” for users. It does NOT serve as a General Purpose Linux desktop system. Rather it serves as a utility to allow you to boot one of your installed system (assuming that you have multiples installed on your system’s drives) as well as to boot ISO files that you have stored on your system’s drives.
It is important to note that whilst SG2D itself uses Grub2, it does not make any changes or additions to the files or boot loaders on your drives. It simply hunts down any existing pre-installed Windows or Linux systems that contain what is known as a loopback.cfg file. Any Linux ISO found that contains that file will also be presented as a bootable item on the SGD2’s menu.
In the case of a Pup, the menu it displays when a particular Pup is selected is very similar to the familiar Grub4Dos menu. Since SG2D is a utility it does not require any setting up when booted and does not store any data.
This document shows that Puppy Linux distros can be booted “Directly” from their ISOs. Using this utility as a boot helper, you can boot a “modern” PUP ISO or an installed OS from your system’s drive(s).
Here’s how...
Scenario
Super Grub2 (SG2D) has a time saving feature for booting ISO files that use a loopback file. These are typically found in mainstream distros that use GRUB2 for booting but some very recent WoofCE produced versions of Puppy dating from Dec 2019 & Jan 2020 also have it included as does Fatdog.
It does NOT require any investigation into the contents of the Puppy Linux ISO and it does NOT require that the latest Puppy Linux ISOs be exploded onto either DVD or USB or system drives at all. Thus, no media is required...merely the presence of your ISO file.
SG2D using your Puppy Linux ISO directs your Puppy boot in a “Live mode” as if you had put it on media. Once you arrive at the desktop, you run Puppy as if it were on media. You have ALL the same privileges, and concerns that you have normally in Puppy Linux use. Session persistence and remastering is available in addition to all the other subsystems that are normal in a Puppy distro.
Pup ISOs that can currently be booted using this method are as below:
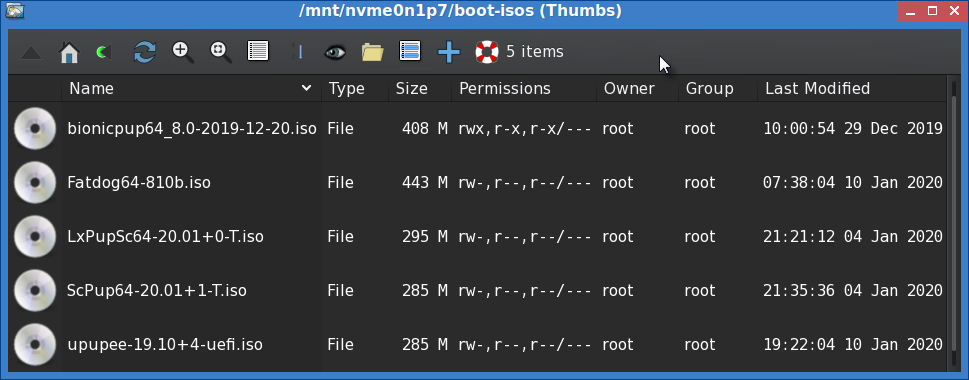
Disadvantages vs Advantages
Disadvantages
- Not suitable for older PUPs.
- If intending to place ISOs on the stick once the image has been written to it, the 2nd 265MB fat32 partition that SG2D creates must be expanded to fill the stick using GParted and may also optionally be converted to a Linux format to provide sufficient space for any ISOs that you wish to place there together with their save files or folders once created.
Advantages
- Each ISO is read and boots directly, so there is no installation to CD/DVD/SSD/HDD/SD/etc..
- ISO file is all that is needed. No files management or space requirement for booting.
- All Puppy services are present.
- No apparent downside in Puppy operations or use.
- Stick is portable so you can carry multiple Pups with you only limited by the size of the stick.
- User selects where to place folder containing the ISOs that will be booted
- Users only need to provide space for persistence...not for the booted-running distro
- Greater security than mere Frugal
Steps (As of 12/25/2019)
Preparation - using SG2D’s IMG file for building a bootable USB for ISO booting
- Download this version of SG2D 7.4 Mb (this version is taken from this webpage)
- Write the SG2D image to a 4GB or larger USB stick. (See Important notes below)
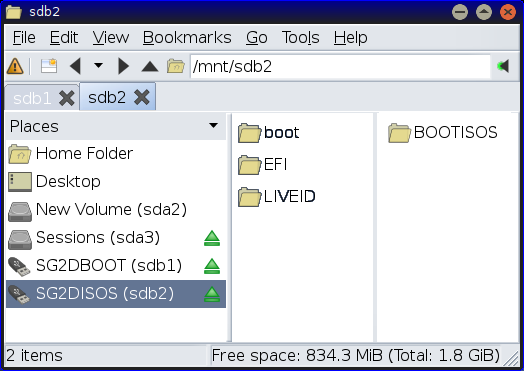
- SG2D creates a 2nd partition on the USB where it expects the user to place ISO files.
- Add your ISO files to the folder “BOOTISOS” (No other name allowed - must be upper case)
Note: The 2nd fat32 partition is not large enough for these modern Puppy Linux ISOs. You will need to convert it to a Linux format and then expand it to fill the stick in order to accommodate a number of ISO files. If you just expand the existing fat32 partition you will be restricted to using save files rather than the more desirable save folders.
- Close (or unmount) the USB and remove it.
Your USB is now ready to allow you to boot it in any PC and, when used at boot time, it will allow you to select what you want to boot.
Booting the USB you created
- Insert the USB prior to starting the PC
- Start the PC
- Insure that you “direct” your PC to boot the USB (every PC has a method for you to direct this to happen)
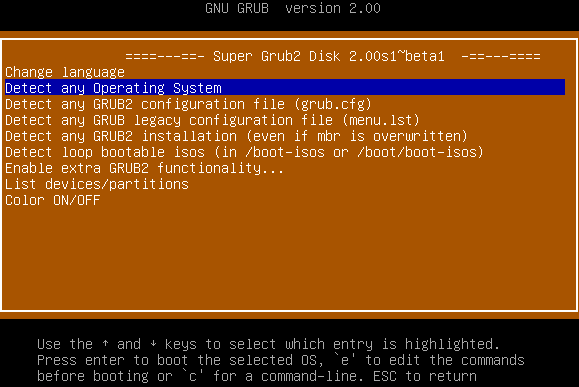
- Once booted, select the 1st option that is highlighted
- Wait patiently whilst SG2D searches for all available boot materials it can find. It will list those found for your selection.
- Select the specific system or ISO from the list of those on-screen (scroll if necessary to see the ISO files it found, pressing the End key will take you to the bottom of the list where compliant ISOs usually appear)
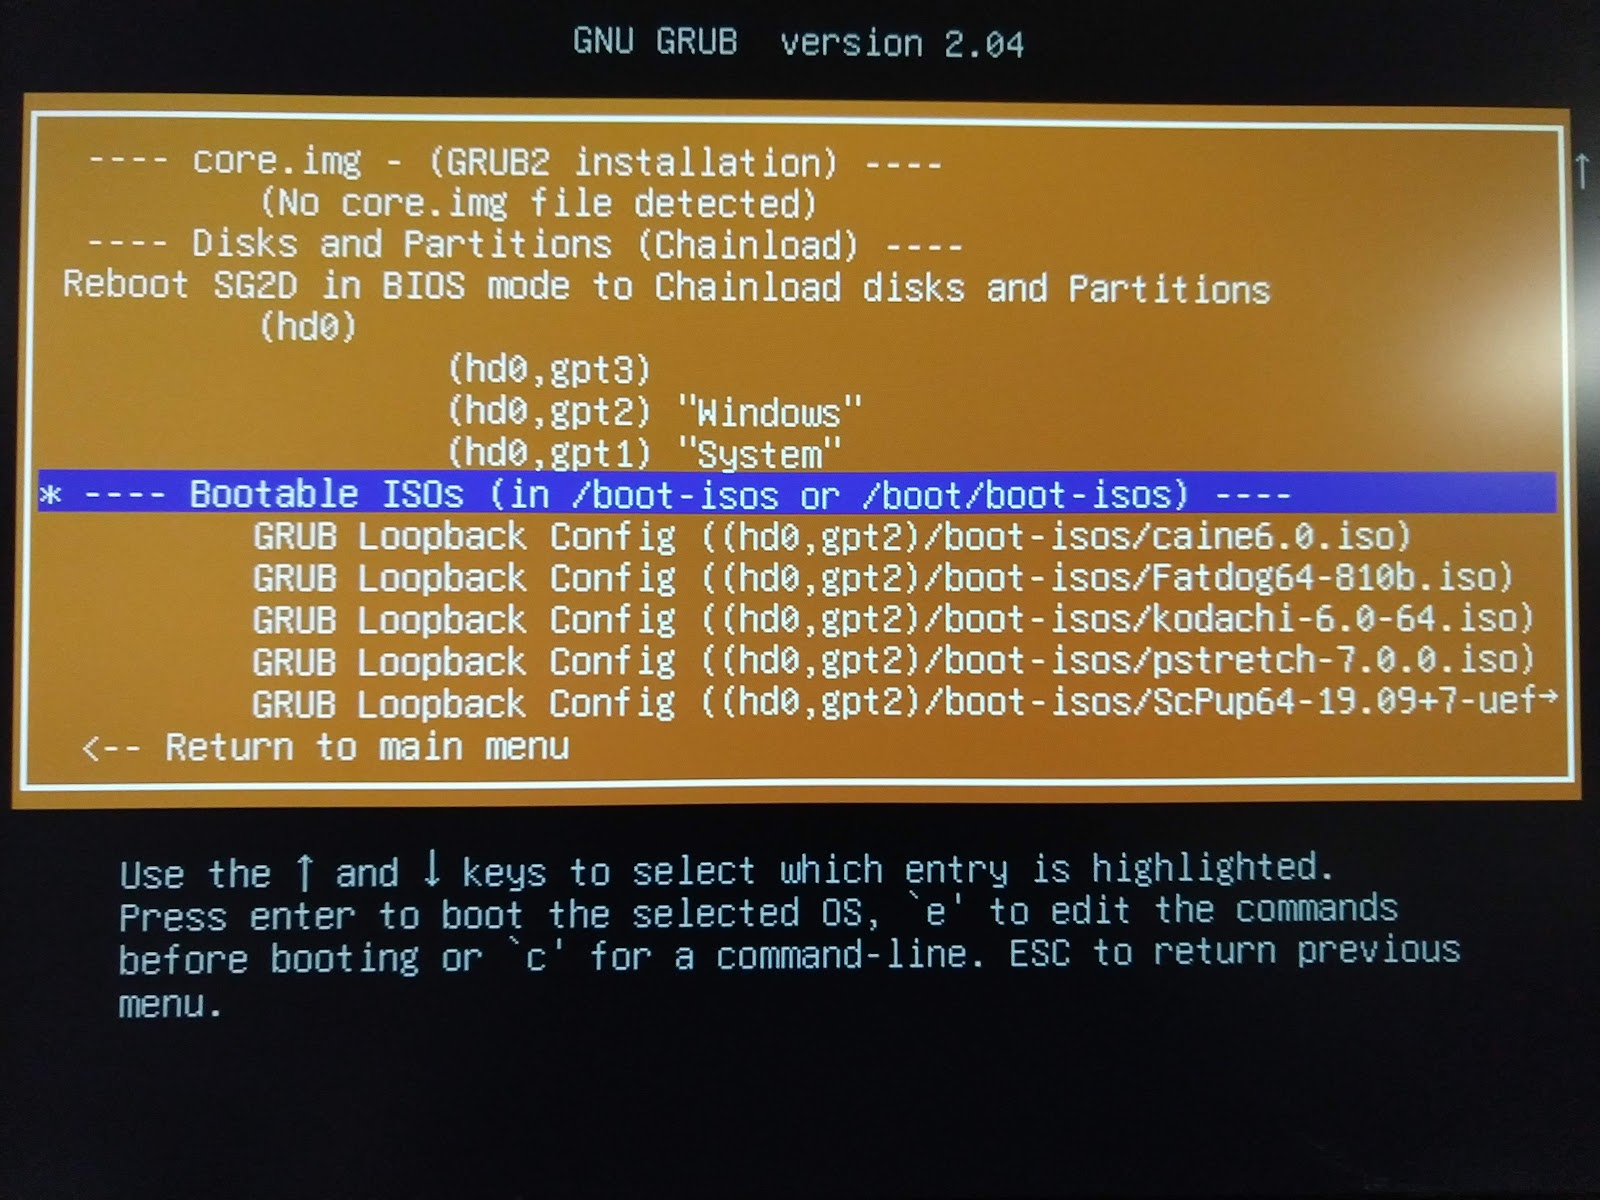
Results
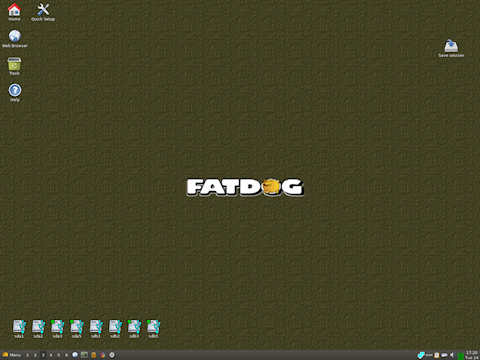
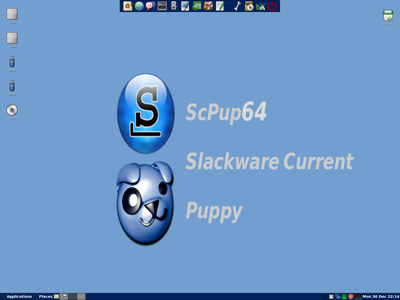
You will now see your selected system booted as if you had installed it on some media.
- For example, here’s a result from my selectable bootables:
- Here’s another result from my selectable bootables:
Conclusion
This easy description allows you the benefit of NOT having to use your ISO(s) to burn media for booting your system(s) for productive use or for testing. Any properly structured ISO which contains a loopback.cfg file will be booted by SG2D.
For PUPPY Linux Users
If you have stored a ‘modern’ PUP distro created out of the WOOFCE methods since the beginning of December 2019, your distro should compatible for discovery by SG2D. Most importantly: Your sessions can be saved per the usual methods for persistence. And expect that it (Persistence) will be found upon your reboots.
This document’s steps was tested for the 3 PUP distro shown above AND it was tested specifically for Rescatux, Ubuntu, Caine, and others not listed.
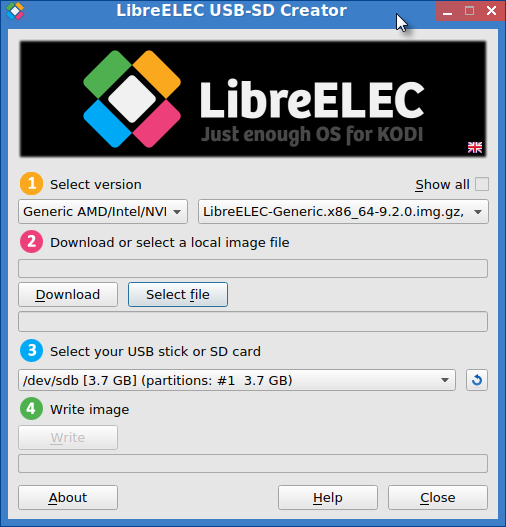
To make life easier a utility [ usb_sd_creator_64bit-v2.pet ] for writing the downloaded .img.zip file to a stick can be found below. It handles both the extraction and writing of the image.
Just ignore option 1 and start with option 2.
Direct download link: (8MB)
Important Notes
Note: Folders for ISOs
You can place a folder of ISOs on the root of any partition that is part of your PC. The ONLY requirement is that is MUST be in a folder named BOOTISOS if on the 2nd partition of a USB stick or boot-isos if using a partition on a HD/SSD/NVME.
SG2D will find the folder(s) which must be in the root and present all eligible ISOs for selection.
Note: 2nd USB partition
If you are using SG2D installed to a partition, the 2nd partition can be expanded if space remains. This can easily be done without destroying any files/folders on that partition. In Puppy Linux, use GParted or Parted to expand the 2nd partition.
References
- Video - Author’s Playlist: “SuperGrub2 Tutorial”
- Video - Using Windows: “How to Boot Using Super Grub2 Disk"
- Link - Downloads: "SGD2 Downloads"
- Link - Supported OSs: "Supported Operating Systems"
Credits
This document owes its existence to several members. Firstly thanks goes out to the Author of SG2D, known as @Adrian15, on GIT. Without his excellent help and the generous answers he gave, this document could NOT have progressed to its present form.
Next, on GIT, several Puppy Linux members have expressly or quietly contributed to presenting Puppy distros which SG2D easily presents to the PC user for boot selection(s). They were @wdlkmpx, @jamesbond3142, and @peabee for releasing Puppy Linux distros which SG2D presents for booting. Also @rizalmart,@gyrog as well as @f0xpup whose GIT thread started the investigation leading to this document. Their contributions provided the pathway to seeing how PUPPY distros collected in a single folder could be selected and booted to a PUPPY/FATDOG desktop while maintaining ALL of the features of a live Puppy distro that Puppy users expect.
Lastly, credit goes out to Puppy Forum member @ETP for his collaboration with GIT user @CollaboratorGCM in the making of this document such that it is made clear for any user of meager Linux background to be able to easily gather and boot ISOs “Live” without ever expanding individual ISOs onto CD/DVD/USB/HDD media.