I play Team Fortress fairly often. My main class is Engineer. Engineer is dependent upon and to some extent controls the movements of the team. Engineer is also the class upon which any defense in this game rests. Without a good engineer, any competent team will defeat any other otherwise competent team, period.
Dustbowl is the best TF2 map, and was the 3rd best TFC map (after Murderball and Hunted). It’s also the most infuriating to see people not understanding how it works. So here is an explanation of how to defend at dustbowl. I will start with section 1, and if I feel like it move on to sections 2 and 3, and then maybe to other maps.
I will also include instructions for how to destroy each of these guns. (In other words: ways in which people owned me.) Spy can always take a sentry, of course, but I’ve noted if a location is particularly vulnerable. And of course there are ubers.
Here we go:
TF2 Attack-Defend maps are defended by smart sentry placement and fast work by Engineers. The engineer cannot do it alone, of course…every good sentry location has vulnerabilities, and an engineer can only fend off one attack at a time. The engineer’s job is to set up their gun in such a way that most ways to get to the point will result in immediate death for the attacker. The rest of the team has two jobs: defend the routes that the engineer has left open, and defend the engineer from attack. If you’re not playing engineer, that is all you need to know…look at where the sentry can’t shoot, and go there, or stay near the engineer. So this post will mostly concern the engineer. I will also discuss how to destroy a sentry in each of these locations.
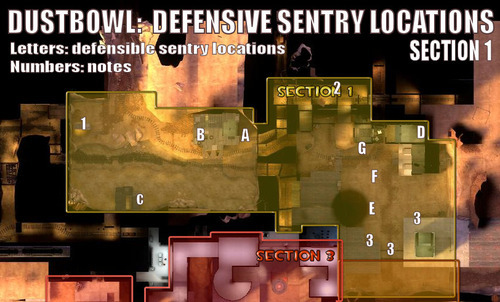
What you see above is a list of sentry locations. The letters are the locations where your first two sentries should go. If sentries 1 and 2 are not in these locations, you lose. The numbers are places I will talk about, and are generally not places you want your gun to be.
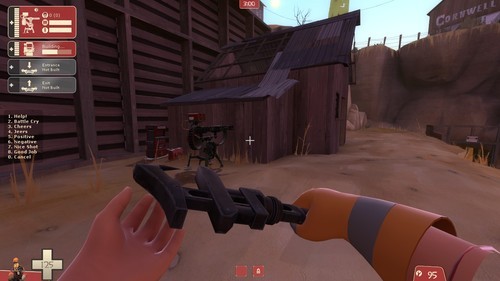
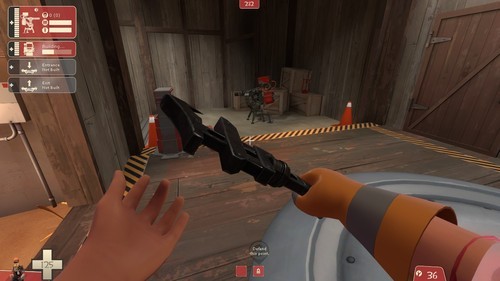
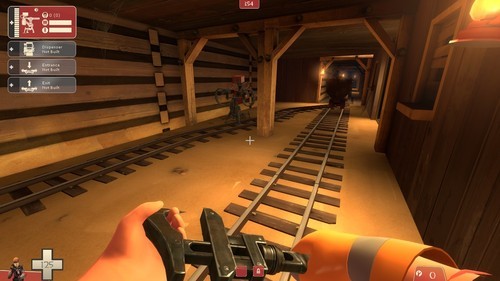
A: If you have only one gun in the first half of Dustbowl 1, it should go here, on the bridge right outside the doorway to the barn containing the point. OUTSIDE the door, not INSIDE. Build it inside and I will burn both you and it to death as a pyro, and neither of you will ever see me. It covers the entrance to the point, it covers most of the point itself, and it covers the back entrance to the point. Note that it is still possible to sneak around the back if you go fast enough or if the gun is distracted, so the rest of the team should guard this route. A well-defended engie in this spot has set up a meat grinder.
To destroy this gun: use a soldier or a sniper from the far right hand side of the map. A sniper should shoot the engineer first, a soldier should shoot at the dispenser first. Demos can maybe hit this from the trench, but it’s not quite as sure a thing. Spies can try to sap the gun from the front, but better is to use the engineer’s teleporter (which they should have built in the tunnel behind them) to sneak up behind them, stab them, then redisguise while sheltered behind the engineer’s dispenser. A pyro, if he can slip past the gun, can fry it from down below the bridge.

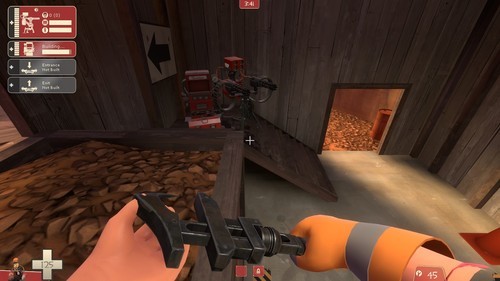
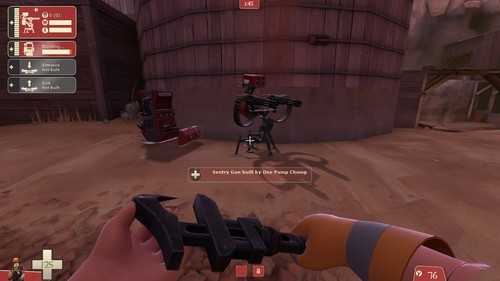
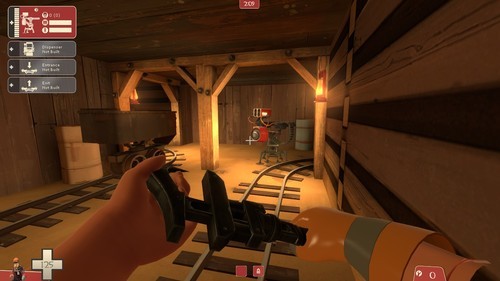
B: If you have a second gun, or for some reason can’t build on point A, build here on the stairs in the corner of the barn. This is sheltered from almost every direction, covers the point better than any A, but can’t cover the approaches to the point.
To take down this gun, use any class (pyro, soldier, demo, and heavy are probably best) and jump on the wagon wheel, then on the deck on the side of the barn, and shoot into the doorway. Spies work better on B than on A, because there’s more than one direction to come from, and there is more traffic through that spot, so it’s harder to spot a spy and harder to kill them.
A demo can shoot through the doorway from down in the trench, but is more likely to be picked off as he’s trying it, and aiming is harder from there. The front door is a little tougher, as you’re very exposed, since you have to go to the right side of that doorway.
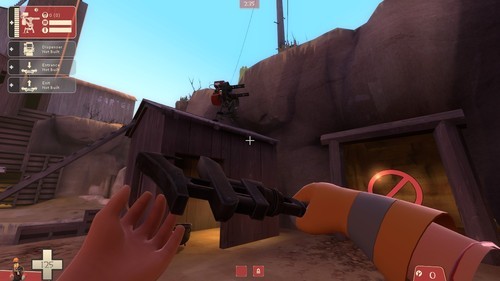
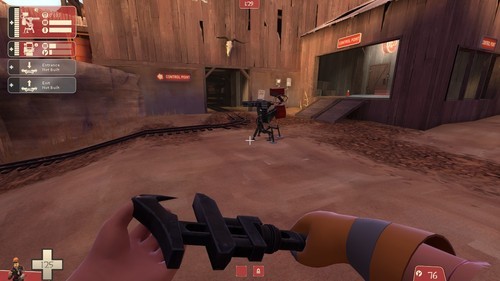
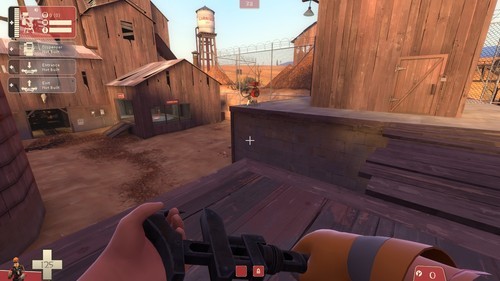
C: This is not a spot you should use unless you can’t use A or B, or you’ve got 3 or more engies. It does not cover the point at all, but covers the approaches pretty well, it is hard to hit from a distance, and it provides good cover for the engineer.
The way to take this gun down is to come around the corner as a pyro and circle the gun. It might take two tries if killing the engineer delays you long enough for the gun to hit you. Demo can also hit it from the trench.
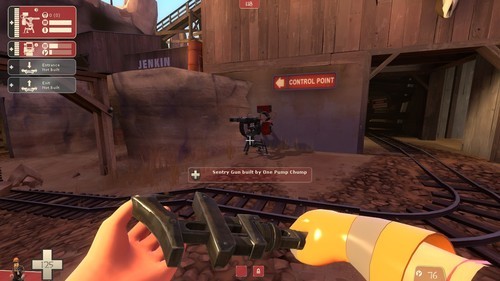
1: This is a tempting location for a sentry gun, either on top of or inside the resupply shack. It is not a good spot, though, it’s way too easy to take out as virtually any class. It can’t cover the sides of the barn that it’s on, and the door is so close that an attacker can get right by without the gun even noticing them. Don’t do it.
D: In part 2, this is the first place you should put a gun. It covers the point entirely, obviously, and it is quite well-sheltered.
The ways to take this gun out are:
Rockets from the patio/roof area to the left of points G F and E. (Sniper will work too if the engineer was stupid enough to build their gun where it is exposed to this direction) You want to hit the floor as close to the gun as you can. You’ll probably get the engie first.
Spy: people come and go all the time, there are plenty of places to escape and hide, and the engineer is probably running around and exposing himself to attack.
Demo: From the platform and doorway right outside the tunnel gate. The gun can’t hit you until you come down the stairs, and you have indirect fire and splash damage.
Pyro: Either rush in down the stairs while the gun is shooting someone else or come around through the main entrance to the point, and circle around the gun (if the gun is built too far forward this is possible).
E: This is the second best point in this section. It barely covers the point at all, but covers every approach to it quite well.
Take this gun out by using Sniper, Demo, or Soldier from the gate, or by rushing around the silo and circling the gun as Pyro. It’s also very vulnerable to spies.
F: This location has pretty good coverage, but is pretty exposed to attack. Most classes can take this by using indirect fire, or charging when it is distracted.
G: This doesn’t have quite the coverage F does, but it is sheltered from attack in any direction except the lower tunnels and the patio.
A pyro can come around the corner from inside the stairwell, assuming there is no gun on E or F.
2: This may seem like a tempting location, and it is very desirable for Blu to hold it. But if you put your gun here, it is not covering the point, nor is it covering the other approaches to the point. If Blu comes up against a sentry in here, they should IGNORE it and focus on the other routes. Note that the end of this tunnel is an excellent place for a BLU sentry.
3: These locations are utterly worthless. They look good, and if you use the Wrangler you’ll get good coverage, but no one wrangles as well as the gun shoots on its own, and without the wrangler, everything you want to shoot is out of range. They WERE the best locations in Team Fortress Classic, but the point has moved.
Something to consider when placing a sentry at all of these locations is the red highlighted areas. Any place highlighted in red is somewhere that an enemy can hit you, but you can’t hit them. You want to have as little of that as possible while covering your objective as well as possible. Those red areas are also where the rest of your team should be if they are not with you.
I grabbed the overview map from Teamfortress.com, the rest are my screenshots.