Hollow Knight Randomizer 3 Guide
Mods Installer ( Download Link )
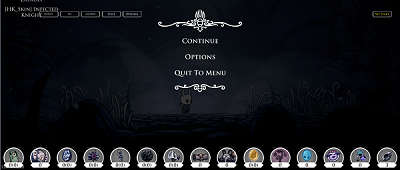
Randomizer - Main Menu Settings
The Randomizer Logic can be found here, along with logic terminology.
Please submit suggestions or videos of tricks via discord.
ModInstaller ( Download Link )
Steam or GoG copy of Hollow Knight is required, with current patch version 1.4.3.2
Download Mod Installer from the link above and Run program. Follow the instructions and be sure to link to the correct Game Folder directory.
* - are not required for playing the randomizer, but highly recommended for certain features.
1.4.3.2 Modding API - install required once mod installer settings are made and linked to your game folder
SeanprCore - must be installed and enabled
Randomizer3 (Item or Room)
Benchwarp - convenient tool to bypass in-game save and quit menuing, and other useful features.
*LoadNormalizer - adds consistent room time loads, required for official races/tournaments
*Player Data Tracker - allows streaming with Trackers
QoL - Quality Of Life features. You are recommended to use the default settings, but if you prefer otherwise, you can toggle features by visiting the file at:
username/AppData/LocalLow/TeamCherry/HollowKnight/QoL.GlobalSettings.json
Fast Text - scroll through text boxes much faster
FixDashmaster - gives priority to horizontal dash over down dash when using a diagonal-down direction while wearing Dashmaster
FixVolume - prevents bug with very loud noises when the ingame volume sliders are set low
InfinitePoP - allows unlimited playthroughs of Path of Pain inside White Palace
MouseBindings - Bind mouse button inputs (shows up as F13/14/15)
NoHardSaves - removes hard save locations throughout the game, Dirtmouth entrance, etc. (off by default)
SalubraKiller - removes Salubra’s Blessing animation
SkipCutscenes - Allows skipping of unskippable cutscenes.
Dev:LogUnityErrors - logs useless unity engine errors in the ModLog
SpeedBroke
SpeedBroke:EnableMenuDrop - allows opening inventory while falling to uncap fall speed and cancel landing animation
SpeedBroke:Storage - Allows storage on current patch
FasterLoads - All transitions are approximately .565 seconds faster, by removing non-load wait time built into the animation
FixFireballs - Walls no longer eat Vengeful Spirit from the wrong side
UnencryptedSaves - Exports .dat savefiles to .json files. Editing the .json files in a text editor (e.g. NotePad) will cause them to supercede the original files when the game is loaded.
SpeedBroke:NoHardFalls - Experimental feature to remove landing animation (off by default)
SpeedBroke:Superslides - Allows superslides
SpeedBroke:Televator - Allows televator, may have unintended side effects
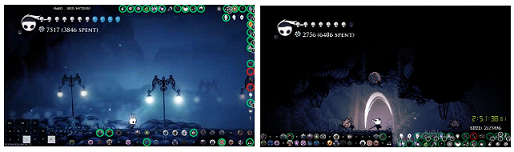
*GeoTracker - Displays total spent geo, excluding deaths and geo in the bank. Used for bingo.
*Bingo UI - A tool for Randomizer Bingo that displays progress towards some of the most common counting bingo goals on screen every time progress is made towards one of them.
*Debug Mod - Useful mod for practicing/learning. Video Demo from Ax2u of 1.2.2.1 Debug, which works the same as 1.4.3.2.
*RandoMapMod - Displays reachable items on the ingame map. You can collect all maps and compass by talking to Elderbug 3 times at the start.
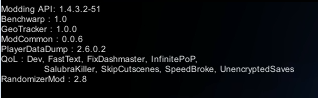
The current list of your enabled mods, and their current versions, will appear in the top left corner while at the main menu or in the pause menu;
Item Tracker
https://kingkiller39.github.io/HollowKnightRandomizerTracker2.8/Index.htmlPlayer
Player Data Tracker is required.
Just follow the onscreen instructions for setting up the tracker, and integrating it through OBS streaming software. Bookmark this link after setting up, to keep settings saved and for quick reference. Reopening the base link will require you to set up settings again
Can be customized with layout variety, icon sizing, and other preferences. Options to display seed number, difficulty, and other info.
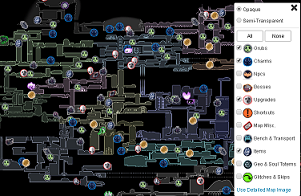
Interactive Map
( external resource )
https://scripterswar.com/hollowknight/map-sketch
Very useful guidance for beginners, showing all item locations in the game. Item groups can be toggled on/off to minimize clutter. This website also has a randomizer logic engine which is extremely outdated.
Randomizer - Main Menu Settings
Seed: - randomly generated upon new file select. Can be edited to any seed of 1-9 digits total, with numbers 0-9 only. This is used for races to make sure all players are running the same seed.
Mode Select
Item Randomizer - Randomizes Items in the game based on Randomization settings
Area Randomizer - Randomizes Map Areas and Items Map of Randomized Transitions
Connected-Area Room Randomizer (CAR) - Randomizes Rooms within the same Map location, and Items are randomized.
Room Randomizer - Randomizes nearly every load transition in the game, and Items.
Open Mode - Randomizes Items in the game, with a Random 5 item loadout at the beginning. Game starts at the City of Tears fountain.
Cursed (Optional Setting) - setting this to "OH YEAH!" will up the completion difficulty for those wanting a somewhat extra challenge. Removes most of the game's convenient safety items; such as pale ores, spell upgrades, mask shards, vessel fragments, and large geo chests. These item locations will be replaced with a "1 Geo" drop. Also randomizes away the ability to heal. Generally creates much longer logic chains.
Required Skips
Preset - Seed Logic Difficulty settings. Easy/Medium/Hard can be selected. Or set True/False on each individually for a custom setting.
Mild Skips - Refers to simpler movement tech, such as using enemies or background items to pogo and reach items and areas. (link example)
Shade Skips - Strategically killing yourself in a specific location to leave a 'shade' to pogo off of, allowing you to access items and locations normally unreachable. (Example)
Fireball Skips - also known as "Air Stalls". Can be used for horizontal boosts to reach locations that normally require a Mothwing Cloak or other movement abilities. Vengeful Spirit and Howling Wraiths are the only spells these skips benefit from - use the ‘Quick-Cast’ button, not the ‘Soul’ button, when attempting these skips. (Example)
Acid Skips - an advanced technique that allows players to travel across areas of acid, without the need of Isma's Tear. Most instances require Mantis Claw and Crystal Dash. (Example)
Spike Tunnels - Being able to maneuver spike tunnel segments without the intended methods. (Example)
Dark Rooms - with this setting set to 'True' Lumafly Lantern is no longer required for any of the game’s Dark Room areas. (Example)
Spicy Skips - Extremely difficult skips. (link example)
Quality of Life
(these are normally all set to 'True', whether you use Hints or not)
Salubra Notches - Will automatically add extra charm notches to your inventory based on the number of charms you collect. 5 charms collected will get you your first extra charm notch.
Fast Grubfather - Instead of receiving individual grub rewards one at a time, enabling this feature has the grubfather throw all of the geo at once.
Early Geo - A QoL feature to begin the game with 200-600 Geo randomly.
Extra Platforms - Adds various platforms throughout the game to facilitate backtracking when checking locations without sufficient items to escape.
1.2.2.1 Levers - another QoL feature for randomizer. Lever Skips (the ability to hit a gated door switch through solid objects) from previous game versions were added in the randomizer. Some can simply be slashed with your nail, while others require a Nail Art such as Great Slash or Dash Slash. For all Lever Skip locations click here
JiJi Hints - Give a Rancid Egg to Jiji to get a hint for an item and its corresponding area. Hints are given for major items (i.e. the most important skills, dreamers, white fragments) in the progression order expected by the randomizer. The hint will contain the type of item and its area, as determined by the area randomizer divisions. (Defaults to off)
Randomization
Preset - (Basic/Completionist/Collector/Junk Pit/Super Junk Pit) Preset settings will determine which of the following randomizations will affect item locations in the game. Each can be individually selected for a Custom setting.
Dreamers - The 3 dreamer locations. Once a Dreamer mask is obtained, the Forgotten Crossroads will become Infected Crossroads. This also includes the World Sense pickup, located next to the Black Egg Temple bench, which gives you the ability to see the completion percentage.
Skills - All spells, nail arts, and movement upgrades
Charms - All charm locations
Keys - All keys in the game, along with other certain key-locked items. Includes all 4 simple keys, Lumafly Lantern, Shopkeeper’s Key, Elegant Key, Love Key, King’s Brand, Collector’s Map, Godtuner
Geo Chests - Chests that would normally reward Geo are added to the randomized item pool. The geo chests in the Junk Pit area and above Baldur shell are not randomized.
Mask Shards - All 16 Mask Shards
Vessel Fragments - All 9 Vessel Fragments
Pale Ore - All 6 Pale Ore
Charm Notches - All 4 Charm Notches (excluding Salubra notches)
Rancid Eggs - All 20 Rancid Eggs (excluding Tuk's Egg)
Relics - All sellable relics (Wanderer’s Journals, Hallownest Seals, King’s Idols, Arcane Eggs)
Maps - All Cornifer locations. Each location is tied to the corresponding map, except for bottom-right Deepnest, which is tied to Quill.
Stags - All Stag Stations, including Dirtmouth and Stag Nest. You can still travel from any station to the stations you have unlocked and Dirtmouth, but you can only unlock new stations by collecting the randomized pickup. The door to leave the Dirtmouth stag station only opens once you have obtained the Dirtmouth stag.
Grubs - All 46 Grubs
Whispering Roots - Whispering roots award a randomized item. You can preview the reward before collecting orbs, even without Dream Nail.
Duplicate Major Items - Creates two copies of major items. The second copy works additively with other copies for additive items. When all copies in a family have been collected, subsequent copies will reward a random amount of geo. The “Dreamer” pickup works additively with the usual dreamers, so that any 3 out of 4 allows access to the Black Egg Temple.
Major Items:
Dreamer, Mothwing Cloak, Shade Cloak, Mantis Claw, Monarch Wings, Crystal Heart, Isma's Tear, Dream Nail, Vengeful Spirit, Desolate Dive, Howling Wraiths, Void Heart
Open Mode
Randomize Start Items
Gives the player a selection of items to start with, including vertical movement and an equipped charm.
Start Location Settings
This setting lets you choose your start location for a more varied start to seeds. The start location can also be randomized for an added surprise!
Create Spoiler Log - Generates the spoiler log, containing the placement of every random item or transition. Helper, Spoiler, and Tracker Randomizer text logs are all generated in their own separate (.txt) files located at:
username/AppDate/LocalLow/TeamCherry/HollowKnight/
Major Items of Progression
Mothwing Cloak / Shade Cloak - allows you to dash horizontally on the ground or in the air, while Shade Cloak adds the ability to dash through enemies and shade barriers. Finding this item early opens up some locations such as Salubra’s Shop and Fungal Wastes, which can lead to other map locations.

Mantis Claw - Gives the player the ability to cling to walls and wall jump. Finding this item opens up the entire game, almost. Early on you can skip the Baldur fight in Ancestral Mound for an item check, go to Salubra’s Shop, or head back up the Dirtmouth entrance to King’s Pass leading to other map locations.

Monarch Wings - Allows you to double jump in the air. Doing a pogo off an enemy or background object allows you to do another wings jump after each pogo. Finding this item early, opens up some locations such as Salubra’s Shop, Fungal Wastes, along with some early item locations that require Wings, such as the Goam Room Mask Shard in Forgotten Crossroads.

Crystal Heart - Once charged up and released, this allows you to super dash across large gaps and distances, horizontally, until the dash is manually canceled or you crash into an object (wall/enemy). Finding this item early gives you access to Salubra’s Shop, by crystal dashing from Gruzmother’s arena.

Isma’s Tears - Item that allows you to safely swim through acid. Finding this item early in the game will give access to Fog Canyon through the southwest exit of Forgotten CrossRoads, through the acid pool. Isma’s Tears is mostly beneficial in locations with several acid hazard spots, such as Queen’s Garden and Isma’s Grove.
Vengeful Spirit / Shade Soul - Shoots a damaging projectile while you have soul stored. Minor progression item In Easy Logic, which is mostly used for combat progression; such as fighting Baldurs in Ancestral Mound and the Baldur blocking access to GreenPath. In Hard Logic, these are used for many sequence breaks using Fireball Skips. When using VS/SS , use the ‘Quick Cast’ button for faster spells.

Desolate Dive / Descending Dark - Allows you to slam into the ground while dealing damage to enemies and breaking through floor barriers. DD early on can be used to kill early Baldur enemies; and gives access to Crystal Peaks by diving through the floor barrier pass the northeast Forgotten Crossroads exit. When using DD, use the ‘Quick Cast’ button for faster spells.

Howling Wraiths / Abyss Shriek - The greatest spell in the game, no, the greatest item in the game. Hollow Knight and Radiance will quit the game and file unemployment once you obtain this spell. Wraiths doesn’t give any progression in Easy Logic. In Hard Logic it shares most of the same setups as Fireball Skips. When using HW/AS, use the ‘Quick Cast’ button for faster spells.

Maybe a Minor Items section here, like fetch quests items ???
Items such as all the Keys, King’s Brand, King Soul, Nail Arts, Dreamnail, Void Heart, etc. ???
Keys ( locations where Keys are used can be found here )
Simple Key - 4 total Simple Keys can be found in the game. Your 1st found Simple key must always be used on the Royal Waterways entrance below Lemm’s Shop; the game won’t allow you to check other locked locations with only 1 Simple Key in your inventory. Depending on Randomization options only 1 Simple Key may be required, which would be for access to the Royal Waterways.
Elegant Key - Unlocks the door to access the Shade Soul chamber, near the Toll Bench and Cornifer location in Soul Sanctum.
Shopkeeper’s Key - Take this key to Sly’s Shop in Dirtmouth, after he has been rescued from Forgotten Crossroads. Will unlock more items for purchase.

Love Key - Unlocks the Collector’s Lair with 4 checks inside, depending on Randomization options. Claw or Wings will be required to navigate this area.
City Crest - Gives access to the left side of City of Tears. Is sometimes a progression item, especially if you get an early Crystal Heart or have Shade Skips disabled.

Essence info with all 3 dream nails, and how essence works and is obtained ???
Dream Nail - 1st progression of Dream Nail. Allows you to fight Dreamer bosses, activate Whispering Roots (essene trees), and collect soul from enemies. Certain checks require you to have Dream Nail, such as the 3 Dreamer locations and the Void Heart location.

Dream Gate - 2nd progression of Dream Nail, this simply allows you to drop a warp point you wish to return to later; costing 1 essence each time you use it to travel. Does not unlock any other item progression locations in the game but can speed a lot of things up.

Awoken Dream Nail - The final progression of Dream Nail. Gives access to the White Palace in Ancient Basin.

Charms - Complete List
The useful charms for a randomizer generally fall under one of two categories: Those that aid progression and those that aid combat. While the combat charms aren’t essential they make fights such as the Radiance easier and can speed up general exploration.
Progression:
Void Heart - Most randomizer races are true ending, meaning the player needs both white fragments and void heart to finish the race, making this charm essential. If geo is tight in the early game it can be worth forgoing it until later when geo isn’t an issue, as it doesn’t serve much purpose outside unlocking the Radiance fight apart from the birthplace checks which are useless until you have King’s Brand and some niche sequence breaks.
Baldur Killers - If you lack any of the other upgrades to kill a baldur it can be worth getting one of Grubberflys Elegy, Glowing Womb, Spore Shroom, Weaversong or Mark of Pride. If you already have another baldur killer though they can easily be skipped.
Dashmaster - Dashmaster can be used for spike tunnels if you don’t have an airstall (Vengeful Spirit / Howling Wraiths)
Sprintmaster - This charm can be used in conjunction with dashmaster to do the crushers in Crystal Peak without Mothwing Cloak.
Sharp Shadow - The slight increase in dash length can be used for Shape of Unn without Isma’s Tear, as well as in sequence breaks for Love Key or the Acid Skip to Fog Canyon from Forgotten Crossroads.
Grubberfly’s Elegy - This charm, on top of being a baldur killer, can also be used in a sequence break to get the chest in Crystal Peaks without claw.
Grimmchild - This causes the Grimm Troupe to appear in Dirtmouth with the quest progressed to the Troupe Master Grimm fight, giving access to the initial Grimmchild check and the TMG Charm Notch check. This essentially means it gives a free check and one behind Grimm, so it is worth getting and then checking when you’re next in Dirtmouth.


Glowing Womb - Used to make some shade skips possible, such as the one at the end of the room with the toll bench in ancient basin to get to the Simple Key and Monarch Wings checks without Crystal Heart.

Combat:
Shaman Stone - Increases spell damage drastically, and is the best charm for spell builds. This plus Abyss Shriek makes Radiance much, much easier. Basically never not worth getting.
Quick Slash - Increases nail attack speed by 50%. Theoretically a 50% nail damage increase, but also makes soul collection faster, buffing spell builds.
Unbreakable Strength - Randomizers have the fragile charms appear as their unbreakable versions, making this charm amazing. Synergizes exceptionally well with Quick Slash and/or Fury of the Fallen due to multiplicative increases in damage.
Fury of the Fallen - Increases nail damage by 75% when on 1HP. Largely useless on spell builds and risky to use, but if you’re confident in your dodging ability it makes nail builds much better. Stacks multiplicatively with Unbreakable Strength, giving a 162.5% damage increase at 1HP.
Spell Twister - Reduces spell soul consumption, which is a nice dps boost for spell builds. It also makes fireball skips easier, such as the one in Queen’s Station, as you can cast one extra spell to get a slightly longer stall.


Item Randomizer
Item counts by area are given for Progressive/Completionist/Junk Pit modes and exclude the items at Grubfather, the Seer, and shops. Areas correspond to those given in Jiji hints.
Green denotes a skip needed in Easy, Orange is Medium and Red is Hard and Purple is out of logic (Hard+)
** ( Videos needed for those that want to contribute, just post in HK Discord channel ‘#randomizer’ with links. Please don’t use Streamable.) **
Don't worry if this list feels overwhelming at first. Any given randomizer seed will require only a few, if any, of these tricks.
If you have trouble performing shade skips, collect an extra mask or equip Fragile Heart before dying. The shade that spawns will be able to take an extra hit, giving a little more leeway. This is never required for any of the following skips, however.
Dirtmouth
Upper Crystal Peaks access with (Claw, Wings, and Crystal Dash)
Forgotten Crossroads
All Item Locations
Glowing Womb spike tunnel skip with (Cloak & VS) , (Cloak & Wraiths) , (Cloak & Dashmaster)
Glowing Womb access with (Infection No vertical)
Goam Room Mask Shard (itemless)
Fungal Wastes access with (Infection)
Infection Pogo to Salubra OR (Blue Lake Access) (Wings required with upgraded Nail)
Fog Canyon access with (Claw and Crystal Dash) , (Wings and Cloak), (Sharp Shadow, Shade Cloak, Claw and Fireball)
Salubra Skip using ( VS or Wraiths ) , ( ShadeSkip ) , ( Infection )
Ancestral Mound
Baldur kills are possible with (Vengeful Spirit, Desolate Dive, Grubberflys Elegy, Glowing Womb, Spore Shroom, Weaversong, Mark of Pride, Dash Slash, or Cyclone Slash) or (Mothwing Cloak)/(MothwingCloak at Baldur Shell)
Baldur skip with (wings and shadeskip) (claw only), (ShadeSkip and Wraiths)
Greenpath
All Item Locations
Baldur kills are possible with (Vengeful Spirit, Desolate Dive, Grubberflys Elegy, Glowing Womb, Spore Shroom, Weaversong, Mark of Pride, Dash Slash, or Cyclone Slash) or (Mothwing Cloak)/(MothwingCloak at Baldur Shell)
Shape of Unn Acid skip with (claw, wings, cloak, crystal dash, VS)
Shape of Unn Acid skip with (claw, wings, crystal dash, shade cloak, and sharp shadow)
Stone Sanctuary (Dark Room) , (tutorial)
Massive Moss Charger with (Shade skip) , (VS) , (Wraiths)
Greenpath Acid Relic with (Wings and DamageBoost)
Thorns of Agony with (VS/Wraiths and CycloneSlash)
Fog Canyon
All Item Locations
Charm Notch with (claw, cloak, and crystal dash), (claw, cloak, wings), (claw, wings, VS), (claw, cloak)
OverGrown Mound - Howling Wraiths check with (wings only)
East Fog Canyon Relic (Damage Boost)
Fungal Wastes
All Item Locations
Queens Station skip with (VS) , (Wraiths)
Spore Shroom with (Shadeskip & Wings) , (explosion pogo and Wings)
Mark of Pride - post Mantis Lords checks (clawless)
Explosion Pogo & Mantis Claw Pogo path (itemless)
Journal under Shroomal Ogres with Claw and (fireball), (wraiths), (Claw & Shadeskip)
Bretta Mask Shard ( Shadeskip with Claw & Wraiths/VS ) , (Claw, CycloneSlash, SoulTwister Charm, Wraiths/VS)
Queen Station Mask Shard with ( Claw + VS OR Wraiths ) , ( Wings Only )
City of Tears entrance with (Claw and Cyclone)
Resting Grounds
All Item Locations
Blue Lake ShadeSkips with (cloak and VS) , (cloak and Wraiths) , (Wings Only) , (Claw Only)
Blue Lake access with (Infection) , (Infection and Wings -Required with upgraded Nail)
Blue Lake Rancid Egg (Claw, VS, Wraiths) , (Claw, VS) < no audio, sorry
Flower Quest check/preview with (wings and shadeskip)
City of Tears
All Item ‘Locations’
City of Tears and Soul Sanctum have several 1.2.2.1 Lever Skips, refer to this link
path to Soul Sanctum, from King's Station (Clawless)
path from King’s Station to nail1 and Waterways (Dive only)
post-Collector checks (Wings only)
Royal Waterways
All Item Locations
path to Flukemarm (Dive only)
Waterways to Dung Defender (Clawless)
Spike tunnel & acid skip to Isma with (cloak, VS, claw, crystal dash)
Spike tunnel skip to Isma with Cloak and Dashmaster, (Cloak and Great Slash), (Cloak and Dash Slash)
Deepnest
All Item Locations
Weavers Den ( shade skip with wings ) > spike tunnel ( Wings only )
Weavers Den spike tunnel with (Claw and Crystal Dash)
Beast Den shortcut with (claw, wings, cloak) , (claw, wings, crystal dash)
Upper Beast Den no Claw ( Wings and ShadeSkip )
Nosk maze access with (Claw and ShadeSkip)** , ( Cloak and Claw )
Ancient Basin
path to Broken Vessel (Clawless)
Basin Pale Ore - Damage Boost (itemless)
Kingdom's Edge
All Item Locations
Quick Slash spike tunnel skip (No cloak)
King’s Brand aspid pogo (No Claw) , (No Wings)
Dash Slash check (No Wings & No Claw)
Colosseum
Hive
All Item Locations
Hive Area with ( only Wings )
Hive Area with ( only Claw )
Howling Cliffs
All Item Locations
Joni’s Blessing dark room with (claw and dash) , (Itemless)
King’s Pass entrance with (Wings and King’s Pass access)
Stag Nest skip with (Wings only) , (Wings only with upgraded Nail) (Without wings)
Bottom Entrance with (Shade Skip , Wings, & Airstall)
Baldur Shell check with (shade skip)
Crystal Peak
All Item Locations
Spike Gauntlet (Grub) with (wings and fireball) , (wings and wraiths) , (wings and dash)
Deep Focus with (wings and dash)
Crystal Heart with (wings shade skip) , (claw and airstall)
Smooshers with (Dashmaster and Sprintmaster)
Smoosher Geo Chest (Elegy ShadeSkip with No Claw)
Peaks Entrance Egg with (Dive and Airstall)
Queen's Gardens
All Item Locations
QG access though QGA acid skip with (claw, cloak, and crystal dash)
Love Key acid skip with (claw, cloak, and crystal dash) , (claw, cloak, wings + (VS) (Wraiths))
[[ Love Key acid skip with (shade cloak, sharp shadow, claw and fireball) , (shade cloak, sharp shadow, and wings) , (Claw, Cloak, Wings and (Dashmaster) (Dash Slash) (Great Slash)) , (Cloak, Wings and (Fireball) (Dash Slash) (Wraiths)) ]]
Queens Garden Rancid Egg Pogos ( Itemless ) , ( VS )
The Abyss
Lifeblood Core from King’s Station (itemless)
Shade Cloak check with (Wings and ShadeSkip)
Sequence Breaks
These are skips that aren’t in logic either because you can lock yourself out of them or they are just too hard.
Baldur Killing with (Longnail), (Sprintmaster), (Cdash and Dreamshield)** , (Thorns of Agony) , (Dreamshield)
Stone Sanctuary Journal with (ShadeSkip & Wings)**
Shade Skip to Blue Lake with (Fireball)**, (Wraiths Only)
GH Segment with (Isma’s)**, (Fireball)**
Peaks Spike Tunnel Grub ShadSkips with (Cloak) , (Wraiths)**, (Fireball)**
Deep Focus with (Wings and Airstall)**
Peaks Hallownest Crown Clawless with ( Wings, Cloak, VS/Wraiths )
Crossroads Well with (Infection)**
Hornet 2 bench with no vertical**
Shade Skip to Broken Vessel with (Glowing Womb)**, (Fireball and increased shade health)
Shade Skip to Crystal Guardian 2 with (Claw) or (Wings)
Crossroads Acid Skip with (Shade Cloak, Claw, Sharp Shadow, Fireball), (Claw, Cloak, Dash Slash, Fireball, Spell Twister)**
Sheo without dash or wings**
Top Queen’s Gardens grub without Cdash using (Soul Twister Charm) , (Dash Slash)
Queen Gardens Grub past Loodles (without Claw)
Deepnest to Queen’s Gardens with just wings**
Optimizations
These are things that don’t necessarily get you something new in logic but either improve quality of life or speeds up checks. Racers will often incorporate many of these strategies per run in order to speed up checks and goals, however they aren’t necessary to finish a seed.
King’s Pass
Hardsave Fury
Used to route in the fury check at the start of the run without having to redo half of King’s Pass by exiting it, getting the hardsave and then warping out after getting fury. The clip also shows the softfall setup which saves around 0.5s. You wouldn’t use this if you instead decide to skip fury, which is done when there are early goals that you want an advantage towards.
Greenpath
Grass Block Skip with fireball
Skips going around the right side in this room. Good when you don’t need the grub or Cornifer location and just want to get to Stone Sanctuary/Fungal. Itemless is slightly slower but still better than going around.
Crystal Peak
Fast Vertical Spike Tunnel Grub
Used to get the vertical spike tunnel grub and progress to the next room faster. Only useful when you have claw so you can take the conveyor on the left wall up.
Pogaxe
Theoretically worth it when you have claw and cloak, but can go wrong in a lot of ways and only saves a few seconds. More of a swag strat but technically optimal.