SlideShare a Scribd company logo
1 of 49
Download to read offline
Creative Layers
  with Claudine Hellmuth


 This free eclass is © Claudine Hellmuth 2010
here’s what we’ll be making!
  Accordion fold book closed & tied with ribbon
here’s what we’ll be making
     Cover of accordion fold book
about the creative layers studio line
I’m so excited to introduce you to you to my new Creative Layers stamp line with
   Ranger and Stampers Anonymous! In this class we’ll be using the sets below:


  Bloom Clear + Foam Stamp Sets               Domestic Clear + Foam Stamp Sets
about the creative layers studio line

Creative Layers are coordinating sets
of clear and foam stamps that I drew
and doodled in my little sketch book.

I was inspired by one color
illustrations from the 40's and 50's
where the color registration is a little
off -- leaving color outside the lines.

Nothing makes my heart flutter like
off-register printing!


Here's an example of what I am
talking about:
about the creative layers studio line
     They can be used independently for stamping with inks or with the
Claudine Hellmuth Studio Paints, but to get the most out of them and achieve
           whimsical illustrative effects, you'll want to layer them!


  Above example left to right: foam stamp alone, clear stamp alone, and both
    stamps layered! There are six Creative Layers collections in all. Decor,
                Domestic, Doodles, Bloom, Nature, Dwelling
     Watch this video for a quick demo how to stamp with foam stamps!
supply list
Claudine Hellmuth Studio Natural Sticky- Back Canvas:
Cut to size: two 5.5” x 12” sheets and two 6" x 12" sheets

Claudine Hellmuth Studio Acrylic Paints:
Modern Red, Painterly Pink, Yellow Pastel, Landscape Green and
Sky Blue

Claudine Hellmuth Studio Mini Matte Multi-Medium

Claudine Hellmuth Studio Craft Sticks

Claudine Hellmuth Studio Creative Layers Collection
FOAM SETS: Bloom and, Domestic (by Ranger)
CLEAR SETS: Bloom and Domestic (by Stampers Anonymous)
supply list continued

Inkssentials ™ Mini Mister™
Ranger Archival™ Ink Pad in Jet Black
Inkssentials™ RubIt ScrubIt™ Pad
Inkssentials™ Ink Blending Tool with Foam
Inkssentials™ Non-Stick Craft Sheet™

Scissors
one - 58" piece of ribbon
four - 5.5” x 5.5” chipboard squares (HINT: use the chipboard
that comes with your Sticky Back Canvas!)

 Ready!? Let’s get started!
Cover of the book

              Get out your 4 sheets of
              pieces of Natural Sticky
              Back Canvas.

               Line them up. You will
              have two sheets that are
              ½ “ shorter than the
              others.

              We’ll be using the
              LARGER two sheets.
              So set the shorter pieces
              aside.
Cover of the book


               Position your 6”x12”
               sheets one above
               each other. We’ll be
               working this way the
               rest of class, stamping
               on both sheets at the
               same time.
Book cover


This is the stamp we’ll be using,   Using your craft stick place a grape
the dots & circles from the         size blob of YELLOW PASTEL paint
Domestic Foam Stamp kit             onto your craft sheet
Book cover


         Press your stamp into the puddle you       Make sure you have a nice even
         made on the craft sheet. Stamp it          coat of paint with no blobs or
         around the craft sheet to remove           globs
         excess and distribute paint evenly
Never stamped with foam before? Watch this video for a quick demo how to stamp with foam stamps!
Cover of the book


                    This is where you’ll be
                    stamping your dots
                    Continue stamping
                    with the foam stamp
                    so the lines repeat.
Cover of the book

              Using your Mini Mister,
              spray mist a piece of Rub
              It Scrub It pad with water,
              then brush your foam
              stamp over the “scrubby
              side” to clean. Dry on a
              baby wipe or paper towel.

              You’ll want to keep your
              Rub It Scrub It handy to
              clean each stamp as we go
              along.
Book cover


                                  place a grape size blob of PAINTERLY
This is the stamp we’ll be using,
                                  PINK paint onto your craft sheet.
the swirly circle from the Bloom
                                  Spread and smooth the paint with your
Foam stamp kit
                                  craft stick.
Cover of the book


                    This is where you’ll be
                    stamping your pink
                    circles.

                    Continue adding paint
                    to your foam stamp
                    between each circle to
                    get a clear impression.
Book cover


                                  place a grape size blob of MODERN
This is the stamp we’ll be using,
                                  RED paint onto your craft sheet.
the large flower from the Bloom
                                  Spread and smooth the paint with your
Foam stamp kit
                                  craft stick.
Cover of the book


                    This is where you’ll
                    be stamping your
                    flowers.

                    Continue adding
                    paint to your foam
                    stamp between each
                    flower to get a clear
                    impression.
Book cover


                                    place a grape size blob of
This is the stamp we’ll be using,
                                    LANDSCAPE GREEN paint onto your
the large leaf from the Bloom
                                    craft sheet. Spread and smooth the
Foam stamp kit
                                    paint with your craft stick.
Cover of the book


                    This is where you’ll
                    be stamping your
                    leaves.

                    Continue adding
                    paint to your foam
                    stamp between each
                    leaf to get a clear
                    impression.
Book cover


This is the stamp we’ll be using,   place a grape size blob of SKY BLUE
the small leaf from the Bloom       paint onto your craft sheet. Spread and
Foam stamp kit                      smooth the paint with your craft stick.
Cover of the book


                    This is where you’ll
                    be stamping your
                    leaves.

                    Continue adding
                    paint to your foam
                    stamp between each
                    leaf to get a clear
                    impression.
Book cover


This is the stamp we’ll be using,          place a pea size blob of PAINTERLY
the doodle circle from the                 PINK + MODERN RED paint onto
Bloom Clear stamp kit                      your craft sheet. Blend together by
                                           tapping your ink blending tool into the
                                           mixture
Book cover


Tap a generous amount directly onto the clear
stamp and then stamp onto your Sticky Back
Canvas
Cover of the book


                    This is where you’ll
                    be stamping your
                    circles

                    Continue adding
                    paint to your stamp
                    between each circle
                    to get a clear
                    impression.
Book cover


This is the stamp we’ll be using,          place a pea size blob of CLASSIC
one of the leaves from the                 TEAL paint onto your craft sheet.
Bloom Clear stamp kit                      Blend together by tapping your ink
                                           blending tool into the mixture. Then
                                           apply the paint to your stamp.
Cover of the book


                    This is where you’ll
                    be stamping your
                    leaves

                    Continue adding
                    paint to your stamp
                    between each leaf
                    to get a clear
                    impression.
Book cover

             Now we’re going
             to stamp using
             Archival Blank Ink.

             A note about
             stamping onto
             fabric.... When you
             stamp on fabric
             the weave of the
             fabric will show.
             This might give
             you a softer image
             than when you
             stamp on paper.
Book cover

             Get out your
             Ranger Archival
             Black ink and the
             large flower stamp
             that looks like this
             from the Bloom
             Clear Stamp set
Cover of the book


                    This is where
                    you’ll be stamping
                    your flowers

                    Continue adding
                    ink to your stamp
                    between each
                    flower to get a
                    clear impression.
Book cover

             Get out the leaf
             that looks like this
             from the Bloom
             Clear Stamp set
Cover of the book

                    Stamp the leaf over all
                    the Sky Blue leaves we
                    added earlier
Book cover

             Get out the leaf
             that looks like this
             from the Bloom
             Clear Stamp set
Cover of the book

                    Stamp the leaf over all
                    the leaves we added
                    earlier using
                    Landscape Green
                    paint
Book cover

Get out a mini bird from the Domestic Clear Stamp Set
Cover of the book

                    Choose a place for
                    your bird and stamp
                    him on!

                    Here’s where I
                    stamped mine.
Cover of the book


Add stems to all your flowers using the black Adirondack Pigment Marker
Finishing the book


Stems on all the flowers!
Finishing the book


Get out the two cover pages and line them up like this on your craft sheet
Finishing the book


Flip both sheets over and remove the paper backing, exposing the adhesive
Finishing the book


                     Adjust your pages so
                     that they overlap like
                     this – about a ¼” of
                     an inch
Finishing the book


Line up the four 5.5”x5.5” cardstock pieces onto the sticky side so they are
about ¼” apart, making sure to leave a border around all the edges.
Finishing the book


Wrap the canvas around the top   When you get to the edges use your
and bottom of the cardstock      scissors to snip at an angle so then you
                                 can fold the edge over neatly
Finishing the book


Place the Creative Impressions ribbon across the center of the book.
Finishing the book


Remove the paper backing and stick the blank pieces of Sticky Back Canvas
on top of the ribbon
Finishing the book


Trim off any excess              Burnish with the Ranger Craft Scraper
                                 to make sure everything is smooth
Finishing the book


Fold the book so the two ribbon pieces are on the ends, wrap the ribbon around
                     your book, tie a bow and you’re done!
the completed project
                        Enjoy your finished project!


Use the inside to display photos! QUICK TIP you can print photos and images
directly onto the Sticky Back Canvas in your inkjet printer!
Thank you! Stay in touch!
I’m always available to answer questions online:

FOLLOW ME ON TWITTER
FAN ME ON FACEBOOK

WEB: http://www.collageartist.com
BLOG: http://claudinehellmuth.blogspot.com

Thank you for taking my class! I hope you
enjoyed using my Creative Layers Stamp
collection!

USEAGE OF THIS CLASS – please feel free to
use this class to teach others and spread the
word about the Creative Layers Stamps &
Claudine Hellmuth Studio Line!

More Related Content

Viewers also liked

2012 04 12-blogvilag
2012 04 12-blogvilag2012 04 12-blogvilag
2012 04 12-blogvilagEsze Dóra
 
San francisco native food
San francisco native foodSan francisco native food
San francisco native foodMari Cheung
 
Mining the social web ch3
Mining the social web ch3Mining the social web ch3
Mining the social web ch3scor7910
 
VodQA3_ATDD_KetanSoni
VodQA3_ATDD_KetanSoniVodQA3_ATDD_KetanSoni
VodQA3_ATDD_KetanSonivodQA
 
Llista provisional d'inscrits vn'12
Llista provisional d'inscrits vn'12Llista provisional d'inscrits vn'12
Llista provisional d'inscrits vn'12Anam
 
My favorite sport[1]
My favorite sport[1]My favorite sport[1]
My favorite sport[1]saraaf2
 
The Forces of Disruptive Innovation for Startups
The Forces of Disruptive Innovation for StartupsThe Forces of Disruptive Innovation for Startups
The Forces of Disruptive Innovation for StartupsJa-Nae Duane
 
Data is the soil khan smith create tech 2012
Data is the soil khan smith create tech 2012Data is the soil khan smith create tech 2012
Data is the soil khan smith create tech 2012Khan Smith
 
Power point 4 media
Power point 4 mediaPower point 4 media
Power point 4 mediajackthompson
 
Dzień kultury i gospodarki
Dzień kultury i gospodarkiDzień kultury i gospodarki
Dzień kultury i gospodarkisknsz
 

Viewers also liked (15)

2012 04 12-blogvilag
2012 04 12-blogvilag2012 04 12-blogvilag
2012 04 12-blogvilag
 
Measure or Die
Measure or DieMeasure or Die
Measure or Die
 
San francisco native food
San francisco native foodSan francisco native food
San francisco native food
 
Secondary market1
Secondary market1Secondary market1
Secondary market1
 
Mining the social web ch3
Mining the social web ch3Mining the social web ch3
Mining the social web ch3
 
Presentation3
Presentation3Presentation3
Presentation3
 
Hachiojipm#13
Hachiojipm#13Hachiojipm#13
Hachiojipm#13
 
VodQA3_ATDD_KetanSoni
VodQA3_ATDD_KetanSoniVodQA3_ATDD_KetanSoni
VodQA3_ATDD_KetanSoni
 
Llista provisional d'inscrits vn'12
Llista provisional d'inscrits vn'12Llista provisional d'inscrits vn'12
Llista provisional d'inscrits vn'12
 
My favorite sport[1]
My favorite sport[1]My favorite sport[1]
My favorite sport[1]
 
Cerpen + analisa
Cerpen + analisaCerpen + analisa
Cerpen + analisa
 
The Forces of Disruptive Innovation for Startups
The Forces of Disruptive Innovation for StartupsThe Forces of Disruptive Innovation for Startups
The Forces of Disruptive Innovation for Startups
 
Data is the soil khan smith create tech 2012
Data is the soil khan smith create tech 2012Data is the soil khan smith create tech 2012
Data is the soil khan smith create tech 2012
 
Power point 4 media
Power point 4 mediaPower point 4 media
Power point 4 media
 
Dzień kultury i gospodarki
Dzień kultury i gospodarkiDzień kultury i gospodarki
Dzień kultury i gospodarki
 

Claudine Hellmuth Studio Free Class Using Creative Layers Stamps

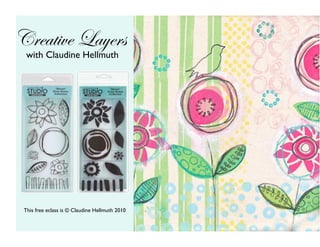
  • 1. Creative Layers with Claudine Hellmuth This free eclass is © Claudine Hellmuth 2010
  • 2. here’s what we’ll be making! Accordion fold book closed & tied with ribbon
  • 3. here’s what we’ll be making Cover of accordion fold book
  • 4. about the creative layers studio line I’m so excited to introduce you to you to my new Creative Layers stamp line with Ranger and Stampers Anonymous! In this class we’ll be using the sets below: Bloom Clear + Foam Stamp Sets Domestic Clear + Foam Stamp Sets
  • 5. about the creative layers studio line Creative Layers are coordinating sets of clear and foam stamps that I drew and doodled in my little sketch book. I was inspired by one color illustrations from the 40's and 50's where the color registration is a little off -- leaving color outside the lines. Nothing makes my heart flutter like off-register printing! Here's an example of what I am talking about:
  • 6. about the creative layers studio line They can be used independently for stamping with inks or with the Claudine Hellmuth Studio Paints, but to get the most out of them and achieve whimsical illustrative effects, you'll want to layer them! Above example left to right: foam stamp alone, clear stamp alone, and both stamps layered! There are six Creative Layers collections in all. Decor, Domestic, Doodles, Bloom, Nature, Dwelling Watch this video for a quick demo how to stamp with foam stamps!
  • 7. supply list Claudine Hellmuth Studio Natural Sticky- Back Canvas: Cut to size: two 5.5” x 12” sheets and two 6" x 12" sheets Claudine Hellmuth Studio Acrylic Paints: Modern Red, Painterly Pink, Yellow Pastel, Landscape Green and Sky Blue Claudine Hellmuth Studio Mini Matte Multi-Medium Claudine Hellmuth Studio Craft Sticks Claudine Hellmuth Studio Creative Layers Collection FOAM SETS: Bloom and, Domestic (by Ranger) CLEAR SETS: Bloom and Domestic (by Stampers Anonymous)
  • 8. supply list continued Inkssentials ™ Mini Mister™ Ranger Archival™ Ink Pad in Jet Black Inkssentials™ RubIt ScrubIt™ Pad Inkssentials™ Ink Blending Tool with Foam Inkssentials™ Non-Stick Craft Sheet™ Scissors one - 58" piece of ribbon four - 5.5” x 5.5” chipboard squares (HINT: use the chipboard that comes with your Sticky Back Canvas!) Ready!? Let’s get started!
  • 9. Cover of the book Get out your 4 sheets of pieces of Natural Sticky Back Canvas. Line them up. You will have two sheets that are ½ “ shorter than the others. We’ll be using the LARGER two sheets. So set the shorter pieces aside.
  • 10. Cover of the book Position your 6”x12” sheets one above each other. We’ll be working this way the rest of class, stamping on both sheets at the same time.
  • 11. Book cover This is the stamp we’ll be using, Using your craft stick place a grape the dots & circles from the size blob of YELLOW PASTEL paint Domestic Foam Stamp kit onto your craft sheet
  • 12. Book cover Press your stamp into the puddle you Make sure you have a nice even made on the craft sheet. Stamp it coat of paint with no blobs or around the craft sheet to remove globs excess and distribute paint evenly Never stamped with foam before? Watch this video for a quick demo how to stamp with foam stamps!
  • 13. Cover of the book This is where you’ll be stamping your dots Continue stamping with the foam stamp so the lines repeat.
  • 14. Cover of the book Using your Mini Mister, spray mist a piece of Rub It Scrub It pad with water, then brush your foam stamp over the “scrubby side” to clean. Dry on a baby wipe or paper towel. You’ll want to keep your Rub It Scrub It handy to clean each stamp as we go along.
  • 15. Book cover place a grape size blob of PAINTERLY This is the stamp we’ll be using, PINK paint onto your craft sheet. the swirly circle from the Bloom Spread and smooth the paint with your Foam stamp kit craft stick.
  • 16. Cover of the book This is where you’ll be stamping your pink circles. Continue adding paint to your foam stamp between each circle to get a clear impression.
  • 17. Book cover place a grape size blob of MODERN This is the stamp we’ll be using, RED paint onto your craft sheet. the large flower from the Bloom Spread and smooth the paint with your Foam stamp kit craft stick.
  • 18. Cover of the book This is where you’ll be stamping your flowers. Continue adding paint to your foam stamp between each flower to get a clear impression.
  • 19. Book cover place a grape size blob of This is the stamp we’ll be using, LANDSCAPE GREEN paint onto your the large leaf from the Bloom craft sheet. Spread and smooth the Foam stamp kit paint with your craft stick.
  • 20. Cover of the book This is where you’ll be stamping your leaves. Continue adding paint to your foam stamp between each leaf to get a clear impression.
  • 21. Book cover This is the stamp we’ll be using, place a grape size blob of SKY BLUE the small leaf from the Bloom paint onto your craft sheet. Spread and Foam stamp kit smooth the paint with your craft stick.
  • 22. Cover of the book This is where you’ll be stamping your leaves. Continue adding paint to your foam stamp between each leaf to get a clear impression.
  • 23. Book cover This is the stamp we’ll be using, place a pea size blob of PAINTERLY the doodle circle from the PINK + MODERN RED paint onto Bloom Clear stamp kit your craft sheet. Blend together by tapping your ink blending tool into the mixture
  • 24. Book cover Tap a generous amount directly onto the clear stamp and then stamp onto your Sticky Back Canvas
  • 25. Cover of the book This is where you’ll be stamping your circles Continue adding paint to your stamp between each circle to get a clear impression.
  • 26. Book cover This is the stamp we’ll be using, place a pea size blob of CLASSIC one of the leaves from the TEAL paint onto your craft sheet. Bloom Clear stamp kit Blend together by tapping your ink blending tool into the mixture. Then apply the paint to your stamp.
  • 27. Cover of the book This is where you’ll be stamping your leaves Continue adding paint to your stamp between each leaf to get a clear impression.
  • 28. Book cover Now we’re going to stamp using Archival Blank Ink. A note about stamping onto fabric.... When you stamp on fabric the weave of the fabric will show. This might give you a softer image than when you stamp on paper.
  • 29. Book cover Get out your Ranger Archival Black ink and the large flower stamp that looks like this from the Bloom Clear Stamp set
  • 30. Cover of the book This is where you’ll be stamping your flowers Continue adding ink to your stamp between each flower to get a clear impression.
  • 31. Book cover Get out the leaf that looks like this from the Bloom Clear Stamp set
  • 32. Cover of the book Stamp the leaf over all the Sky Blue leaves we added earlier
  • 33. Book cover Get out the leaf that looks like this from the Bloom Clear Stamp set
  • 34. Cover of the book Stamp the leaf over all the leaves we added earlier using Landscape Green paint
  • 35. Book cover Get out a mini bird from the Domestic Clear Stamp Set
  • 36. Cover of the book Choose a place for your bird and stamp him on! Here’s where I stamped mine.
  • 37. Cover of the book Add stems to all your flowers using the black Adirondack Pigment Marker
  • 38. Finishing the book Stems on all the flowers!
  • 39. Finishing the book Get out the two cover pages and line them up like this on your craft sheet
  • 40. Finishing the book Flip both sheets over and remove the paper backing, exposing the adhesive
  • 41. Finishing the book Adjust your pages so that they overlap like this – about a ¼” of an inch
  • 42. Finishing the book Line up the four 5.5”x5.5” cardstock pieces onto the sticky side so they are about ¼” apart, making sure to leave a border around all the edges.
  • 43. Finishing the book Wrap the canvas around the top When you get to the edges use your and bottom of the cardstock scissors to snip at an angle so then you can fold the edge over neatly
  • 44. Finishing the book Place the Creative Impressions ribbon across the center of the book.
  • 45. Finishing the book Remove the paper backing and stick the blank pieces of Sticky Back Canvas on top of the ribbon
  • 46. Finishing the book Trim off any excess Burnish with the Ranger Craft Scraper to make sure everything is smooth
  • 47. Finishing the book Fold the book so the two ribbon pieces are on the ends, wrap the ribbon around your book, tie a bow and you’re done!
  • 48. the completed project Enjoy your finished project! Use the inside to display photos! QUICK TIP you can print photos and images directly onto the Sticky Back Canvas in your inkjet printer!
  • 49. Thank you! Stay in touch! I’m always available to answer questions online: FOLLOW ME ON TWITTER FAN ME ON FACEBOOK WEB: http://www.collageartist.com BLOG: http://claudinehellmuth.blogspot.com Thank you for taking my class! I hope you enjoyed using my Creative Layers Stamp collection! USEAGE OF THIS CLASS – please feel free to use this class to teach others and spread the word about the Creative Layers Stamps & Claudine Hellmuth Studio Line!