Prior to using Git with RStudio you should install git using the appropriate method for your type of computer platform. See: http://git-scm.com/downloads
Once you have git installed you'll need to activate it within RStudio by following these steps in RStudio itself:
Click Tools > Global Options then select the Git/SVN tab and click Enable version control interface for RStudio projects.

Please ensure that the path to the Git executable is correct. To do this click Tools > Shell... then at the shell prompt type:
which git
The the returned path should match that in the RStudio Options window. If not please change the RStudio path.
This is particularly important on Windows where it may not default correctly (e.g. C:/Program Files (x86)/Git/bin/git.exe). On Mac it may be either /usr/bin/git or /usr/local/bin/git.
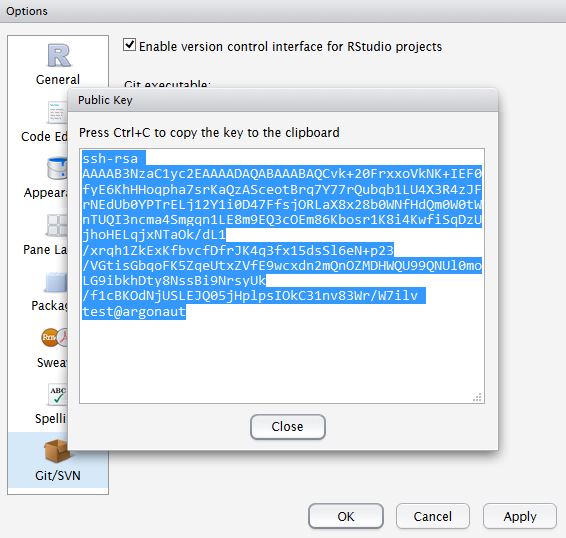
Click Tools > Global Options then select the Git/SVN tab and make sure the Enable version control interface for RStudio projects is clicked.
Now hit, Create RSA Key.
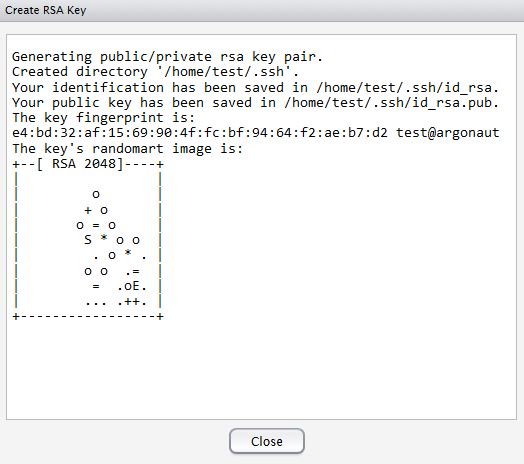
Close this window.
Click, View public key, and copy the displayed public key.
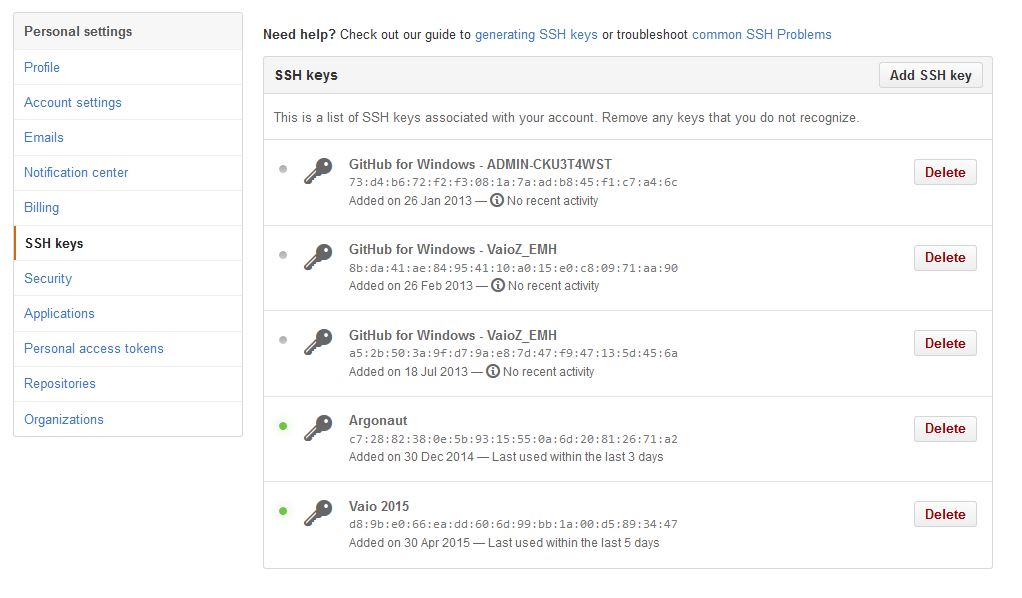
This text should should now be pasted into GitHub. On GitHub open your account settings and click the SSH keys tab. Click Add SSH key. Now paste in the public key you have copied from RStudio.
Tell Git who you are. Remember Git is a piece of software running on your own computer. This is distinct to GitHub (that we will talk about later), which is the repository website. In RStudio, click Tools > Shell ... > Enter. Then paste in the following with substituting your name and email in place of mine below:
git config --global user.email "bjgrant@umich.edu"
git config --global user.name "Barry Grant"
Lets begin creating content by opening a new RStudio Project. Projects are a good way to organize your work. It is similar to creating a new folder/directory and using it to store all the files related to a particular project.
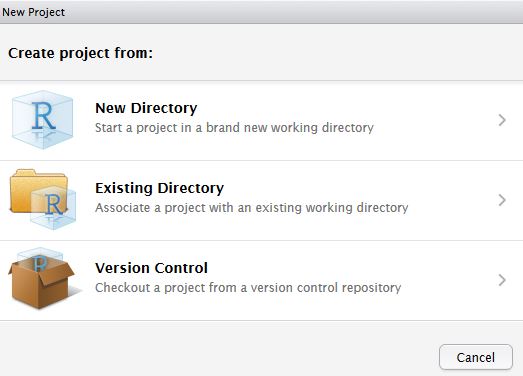
To do this click File > New Project > New Directory > Empty Project
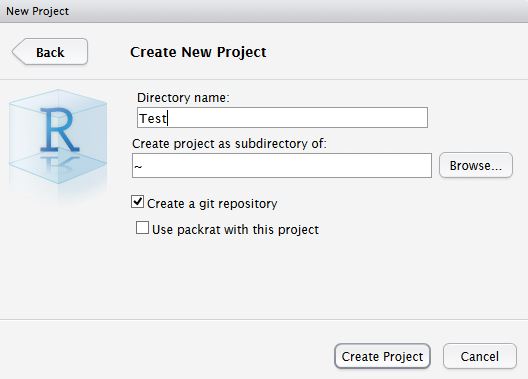
Lets give your new project the name Test and set the location to your Desktop folder. You can either type this in or Browse to this location.
Also please be sure to click the optional Create a git repository option!!!
This will start a new clean RStudio session. Note if you have done this properly then two files will be placed in your new directory/folder named Test (you can see these in your Files pane of RStudio interface). We will talk more about these later. If you don't see these files then please let me know.
In RStudio, click File > New File > R Markdown document > From Template > GitHub Document > OK.
This will create a new document in your project folder/directory and display it in RStudio. Save this with the name rstudio_report.
Note don't use spaces in your files names please - unix systems don't like this.
After saving your new script (i.e. the file named rstudio_report.Rnw), it should appear in the Git tab on the Environment / history panel.
Also in RStudio a black-red-green GIT icon on the top toolbar should appear. Click this and then Git > Commit...
This should bring up a new window where we can both Stage our files for version control tracking and provide a descriptive commit message.
To do this first click on the Staged tick boxes next to each filename then type the commit message "First commit" into the text box and click Commit.
Congratulations - you have just made your first Git commit!
Stop here for a demo from Barry along with further discussion. If you finish early feel free to explore the result of clicking the Knit button on your script. Make changes to your script (i.e. your 'rstudio_report.Rnw' file) and staging/committing with Git.
If you haven’t already, create a GitHub account at https://github.com. Make sure you pick the free plan.
Once you have done this we can begin creating and tracking your RStudio projects on GitHub.
In GitHub, create a New repository by clicking the plus + icon in the top navigation bar here and then New repository. I named mine “test”.
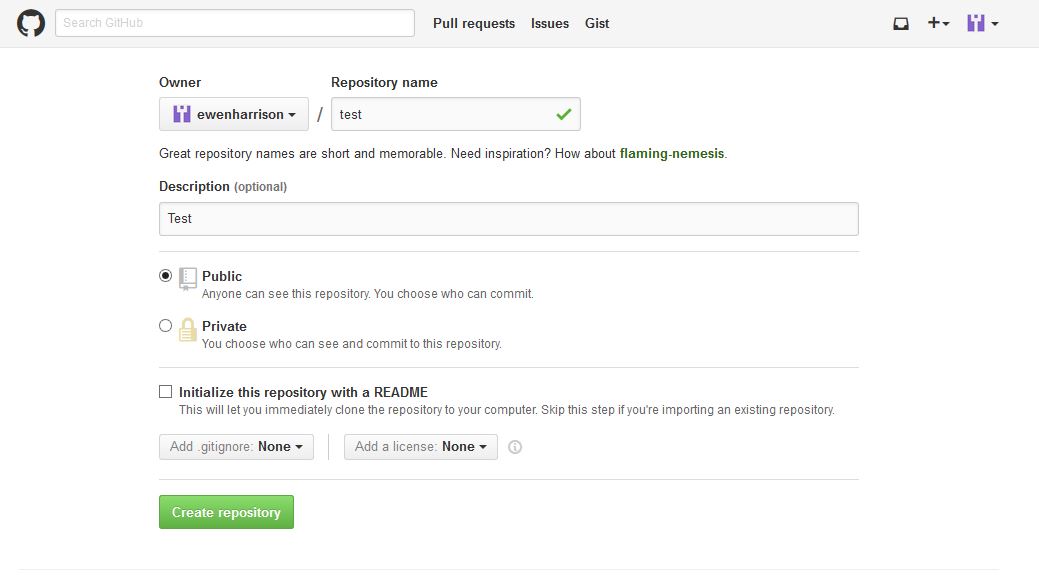
On the resulting GitHub web page copy the text under ”…or push an existing repository from the command line”. We will need to add this to our RStudio project.
Back in RStudio, again click Tools > Shell … . Enter:
And then paste your coped code in to the shell. Mine looked something like this:
git remote add origin https://github.com/bioboot/test.git
git push -u origin master
You can close the shell after this and return to RStudio.
After saving your new script, it should appear in the Git tab on the Environment / history panel.
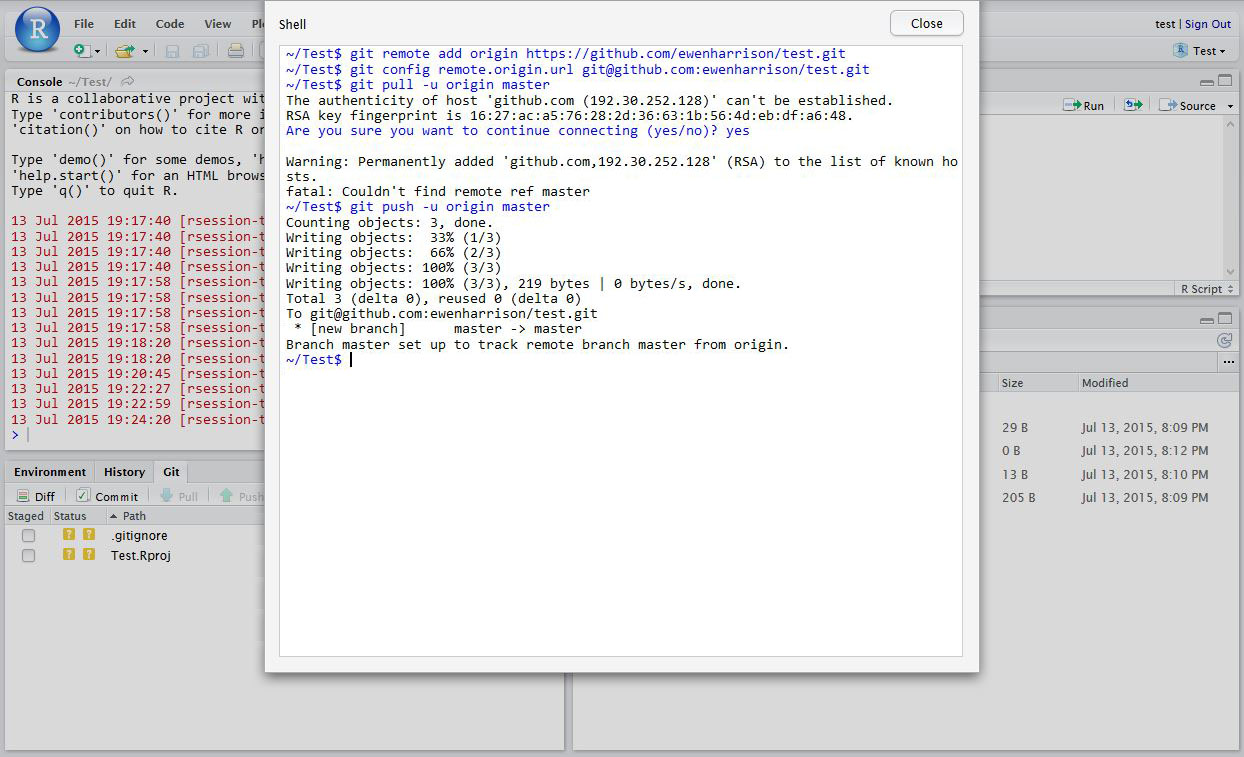
You have now pushed your commit to GitHub, and should be able to see your files in your GitHub account by refreshing the web-page (i.e. reloading). The Pull Push buttons in RStudio under the Git icon will now also work. Remember, after each Commit, you have to Push to GitHub, this doesn’t happen automatically.
Congratulations - you have just posted your first commit to GitHub!
If you still have time for more hands-on work consider adding a README file and editing this on-line via GitHub. You can then use the Git > Pull option in RStudio to have this synced to your local computer.