French 202 Student Tutorial
This document is online at http://tinyurl.com/french202
Get help at the Weigle Information Commons, Van Pelt - Email us to request an appointment.
Note 1: We strongly recommend using Chrome as your browser to minimize problems.
Note 2: Please remember not to edit the pages of other students.
Contents:
Canvas Pages
- Log in to Canvas and open your course.
- Click on Pages in left panel.
- Find your page and click Edit Page in right panel.
This is your page for use throughout the semester. You can copy/paste text and links from Microsoft Word. You can embed images, documents, videos and other media and create links to web resources. You can embed videos from VoiceThread.
Canvas Page Editing Tutorials
- Editing Pages
- Basic Text Edits
- Images from the web
- To include images from your computer or digital camera, put these images in Penn Box (share with Penn community) or Dropbox (public folder). This will give you a web link for the image that you can embed in Canvas.
- Adding links to websites
- Adding tables
- HTML Tags: You can enter HTML tags by clicking Switch Views when editing a page. However, most HTML tags though will be removed by Canvas.
Record Your Videos
Macs make video recording easy. Record video using iMacs, Mac laptops, iPads or mobile phones. We strongly recommend the iMacs available in Rm 116, 117, 118, 119 and 120 here at Weigle Information Commons. You can also use a Macbook, iMac or an iPad in the Vitale Digital Media Lab, located at the very back end of the Commons.
Record on Mac with Photo Booth: - Video Tutorial
1. Start Photo Booth (Search for Photo Booth using the magnifying glass at top right corner).
2. Your webcam will start. Click the video icon on bottom left of Photo Booth. The red camera icon will become a video camera icon.
3. Click record and speak. Click stop and close Photo Booth when done.
4. Start Finder (Icon is usually on the bottom left of your screen).
5. Click Today to find files created today. The video will probably be called “Movie 1.mov”. Macs record videos in QuickTime format by default. Rename the movie with your name and chapter number (SmithChapter1.mov for example) to make it easy to locate later.
Note: If you encounter difficulties with Photo Booth, you can try iMovie or QuickTime.
Record on Mac with iMovie: Video Tutorial
1. Start iMovie (Search for iMovie using the magnifying glass at top right corner).
2. Click the video camera icon at middle left. Your webcam will start. Click Capture to start the recording and Done to stop. You can pause along the process.
3. Your video clip will appear in your library. Drag the clip to your project to put it into your movie.
4. Save your project. Click Share and Export your video to Quicktime using the iPhone preset.
5. Upload the exported video file (not the iMovie project)
iMovie is a great choice if you want to edit and improve your video.
Recording on PC laptops can be complex.
Record on PC with Webcam: You can record your video using Microsoft Movie Maker (Windows MovieMaker Tutorial). If your PC does not have Movie Maker, webcam software will be needed. It’s likely your laptop already has some software from the webcam manufacturer. There are also several hundred types of webcam video software you can download.
Upload your video to Canvas
Canvas accepts many video formats (See list of acceptable formats). Canvas will not accept videos that are bigger than 500 Mb. ((See instructions on how to compress videos.)
- Open your page where you want the video to be played.
- Although you could record video directly into the page (Learn how), we do not recommend this (no one can retrieve your video if you accidentally delete the link on your page).
- We recommend recording and checking your video, then uploading it.
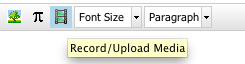
- Click the film strip icon to Record/Upload Media.
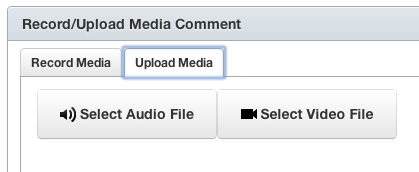
- Choose the tab to Upload Media. Click on the Select Video File button to browse your computer for the file.
- Find the video file on your computer and hit upload. Your video may take a few minutes to upload, especially over wireless.
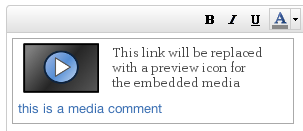
- While you’re editing your page, the embedded video will look like this:
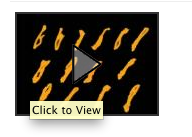
- Once you Save Changes, the video embed will look like this:
Internal Links and Anchors
Internal links help you connect parts of a long page by jumping directly to a different spot. Create a table of contents on your page using anchors.
- Add placeholders for each chapter at the beginning of your page. You will turn these into the links that will jump to the anchor lower down on the page.
- When you add a new chapter, include a heading at the top with the number. You will turn this into the anchor that you will link to.
- Click on Switch Views to look at the page in the HTML view. Find your placeholders and chapter headings, and use the code below to turn the placeholders into links, and the chapter headings into anchors.
Code for top of page:
<a href="#chapter1">Chapter 1</a>
Code for anchor in page:
<div id="chapter1">Chapter 1</div>
When you’re finished, your code will look something like this:
<a href="#chapter1">Chapter 1</a>
<a href="#chapter2">Chapter 2</a>
<a href="#chapter3">Chapter 3</a>
<a href="#chapter4">Chapter 4</a>
<div id="chapter1">Chapter 1</div>
Here is my first chapter.
<div id="chapter2">Chapter 2</div>
Here is my second chapter.
<div id="chapter3">Chapter 3</div>
Here is my third chapter.
<div id="chapter4">Chapter 4</div>
Here is my fourth chapter.
4. Click on Switch Views again to return to the simple editor and change your spacing, formatting and line breaks there. No more code required!
Notes and troubleshooting
Weigle Information Commons staff are here to help you! Please don’t waste your time struggling with video conversion and uploading - stop by, call or email us with questions.
Online tutorials are available for iMovie and Windows Movie Maker. Our subscription to Lynda.com is a great way to explore video editing. Workshops and one-on-one assistance are available with iMovie.
It takes time to upload video. A wired Internet connection is much more reliable for video upload than wireless connections. You can move files from a laptop to a desktop with wired Internet using a USB flash drive or a data DVD. (We have large USB drives available in the Vitale Digital Media Lab.) Please do compress your video, especially if it is more than 2 gigabytes in size. Here are instructions on how to compress your video.
iPad Note: To record video with the iPad, hold the device sideways with the black button next to your left hand and the side volume button at the bottom. If you use any other orientation, it will not display correctly during online playback. Use a USB connector cable to import the video to another computer, or if you have a Dropbox account, save the video to your account and access it later on a desktop or laptop. For more information about iPads, see our LibGuide for the faculty iPad Pilot Program.
Please don't hesitate to contact the WIC Desk at 215-746-2660 or the Media Lab at 215-746-2661 or email us at wic1@pobox.upenn.edu - we can meet with you by appointment or walk-in.